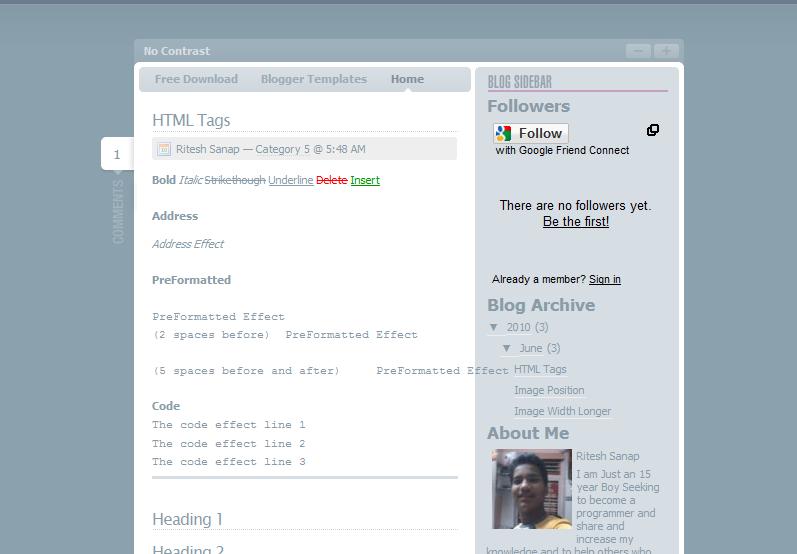
 Hi Its Been Many days you have not seen any post from me nor any blogger template from me , so for that I m extremely Sorry . I had been quit too busy due to Some things Colleges and Work and etc but i have converted a template for you. The Template Designer is Andrei Luca , Who made the Lightword Template and this template was downloaded more then 30,000 times within a Month and that’s a Record. with the awesome skill he also made No Contrast Template. So i also Thought To convert this Template also to blogger and i did it.
Tag: Hacks
SkipScreen:Download From Rapid Share,Mega upload,Media Fire or Any Hosting SiteWith Out Waiting For Seconds (Download In Single Click)

All Of You May Know About Rapid Share,Mega upload,Media Fire. If Not Then They are Hosting Site Which gives you latest Stuff On Web2.0 To Download And Upload.For Fast Download You Need Premium Account Otherwise You Have To Wait For Some Time If You Want To Download All For Free.But Today i am giving You One Firefox Add-one.
Skipscreen is a free and handy Firefox plugin designed to auto-clicks through the ad-screens of the hosting site. Once you click on a download link, SkipScreen will do all the work until the file starts downloading. So if you a hardcore file downloader this is a must have add-ons.
Just to share Skipscreen has already crossed 1 million download and the download only seems increasing. Click the below link to try it for yourself.
Please Share Your Experience Below
How to RIP A MOVIE

Yes Today I m going to tell all of you how to RIP Movies. Movies are watched by each and everyone in their whole life. they are source of entertainment and also used to spread knowledge so today related to movies I m going to share Knowledge.
What is RIP?
RIP is basically meant to REST IN PEACE . but the termed has been changed that RIP means compressing the content then its original size to extremely small size.
In this tutorial I’m going to explain how to encode movies with MeGUI, First your going to need a good source for your movie your wanting to encode, Anything in the 700Mb xViD encoded range should be good.
Softwares You Need :
- Avisynth
- MeGUI
- Nero AAC (Audio Codec)
All software’s you need have been enclosed in a package.
Download : Click Here
Install MeGUI run it and get it fully updated.
Install AviSynth, Then your going to need Nero AAC (Audio Codec) its excellent for compression,
Install Nero ACC executable files in the MeGUI folder which is;
#/Program files/meGUI
Restart your PC,
Start up MeGUI once its loaded press “CTRL+R“, That will open “AVISynth Script Creator“
1. Select the source movie you want to encode.
2. Make sure “Resize” Is UNTICKED.
3. Click save and save the script.

1. The AVS file you just made should already be selected if not then select it.
2. If the OUTPUT of the encoded file isn’t pre defined define it now.
3. Make sure the Codec is set at “x264”
4. Make sure “MKV” is selected as the file container.
5. Select “HQ-Slower” as the video profile.
6. Select the original video source as the audio input.
7. If the audio output isn’t yet defined define it now.
8. Select “NDAAC-HE-64Kbps” as the audio profile it provides perfect compression to bitrate ratio.
9. Select “ND AAC” as the codec
10. Select “MP4-AAC” as the audio extension.
11. Press “AutoEncode.

1. Select the container as “MKV”
2. Define your desired output of the encoded movie
3. Make sure the file size radio button is selected, And define the file size as 300MB or 400MB depending
on the length of the movie (Try to get the bitrate at 450ish)
4. Select “Queue”
5. Go to the Queue tab once your back on the main MeGUI page and select “Start down the bottum, It will ask
if you want to create a worker, Create one.
And that’s how you do it guys….
NOTE : IF U HAVE LOW CONFIGURATION IT WILL TAKE ABOUT 3 HRS
GTalk Tips and Tricks / Shortcuts
 I think many of the user an visitor of my site might be knowing the google messenger which is called GTalk (Google Talk) officially released by google . it good simple and lighter it is just about 1 or 2 MB but it is great i too use it and it is too simple to use but today i will make it more simple to you to use by giving some shortcuts.
Dont have GTalk Click Here to Download.
Here are some Keyboard Shorcuts :
CTRL + Mousewheel up/down: Change the font size in a conversation window.
CTRL + E: Center text
CTRL + R: Right justify text
CTRL + L or CTRL+J: Left justify text
F9: Open Gmail to send an email to the person you talk to
F11: Start a call
F12: Stop the current call
ESC: Close the current window
Tab – Switches to next opened gtalk window. (same effect with Ctrl+tab and Shift+tab)
Shift + Tab – The same thing does that Tab but in reverse.
Ctrl + Shift + L – Switch between points, numbers, letters, capital letters, roman numbers and capital roman numbers
Bold Text : Use asterix before and after the text to make it bold. Like *hello* will make it hello.
Italic Text : Use underscores before and after the text to make it italic. Like _hello_ will make it hello.
Want to leave blank message : Just Press Shift + Enter together and meassage box will become big then leave shift and Just press Enter and the blank message will be received by your friend.
Windows Vista CD key
Hi again I m gonna give you something which is only for windows vista users many of you don’t like to buy an original copy windows then this is the best way to get you activated your windows but I want to tell every user that don’t support piracy instead of that buy that product because the product bought pirated are some time fake and sometime they don’t work . I too love games so buy them original . this is my opinion that you don’t support piracy but as you are in difficulty I m always to support you so today I m going to release some of the vista keys that I have received when I bought and some are given by friends so I would like if you thank them too.
Here are the Keys:
S/N: 11897-OEM-0021902-19210

S/N: YFKBB-PQJJV-G996G-VWGXY-2V3X8

S/N: VMCB9-FDRV6-6CDQM-RV23K-RP8F7

S/N: 8rs83438dg8a83vcshsj

S/N: YFKBB-PQJJV-G996G-VWGXY-2V3X8

S/N: 7W3KH-TG8DP-W78W8-KMV8C-DV9J7

S/N: YFKBB-PQJJV-G996G-VWGXY-2V3X8

S/N: yfkbbpqjjvvwgxy2v3x8

S/N: VMCB9-FDRV6-6CDQM-RV23K-RP8F7

S/N: V4TYH-74MWQ-6VTBQ-XRD3V-9MMX2

S/N: YFKBB-PQJJV-G996G-VWGXY-2V3X8

S/N: VMCB9-FDRV6-6CDQM-RV23K-RP8F7

S/N: 8rs83438dg8a83vcshsj

S/N: YFKBB-PQJJV-G996G-VWGXY-2V3X8

S/N: 7W3KH-TG8DP-W78W8-KMV8C-DV9J7

S/N: YFKBB-PQJJV-G996G-VWGXY-2V3X8

S/N: yfkbbpqjjvvwgxy2v3x8

S/N: YFKBB-PQJJV-G996G-VWGXY-2V3X8 This serial will work with any version of Windows Vista released before 9/1 07. Work with Beta, RC 1, 2 and RTM, Final

S/N: TCP8W-T8PQJ-WWRRH-QH76C-99FBW S/N: PVYFQ-2JTBV-9KXQ2-FQHDY-MTBVH

S/N: 722X2-M2J8D-29KX4-RXFFQ-QWHFD Business version-English Upgrade only

S/N: 8rs83438dg8a83vcshsj

S/N: 9bbvt-rr6m6-mrxd3-4j97f-rcgfq

S/N: 7W3KH-TG8DP-W78W8-KMV8C-DV9J7

S/N: YFKBB-PQJJV-G996G-VWGXY-2V3X8

S/N: yfkbbpqjjvvwgxy2v3x8

S/N: 7x9r6-99427-v6dyq-yj493-wpcgf
This is the real Product Key not a fake one at all if it does not work don’t think its a bad one its a good one just call Microsoft and tell them its not working thats means to many people have used this code ok email me if you need help.
Please Note [Update] :
According to Karakacan all the Serial keys have been stopped working, please note that while activating this serials keys won’t work if you connect to microsoft for updates, I recommend you all use the serial Key’s only while installing the windows, after installation use the Activator provided in below Link :
As a suggestion turn off Microsoft Windows Updates to avoid getting caught. The above Activator Works for Windows 7, Windows 8, Windows XP, and Windows Vista
Update: Above link will not work as the files are taken down due to DMCA report by Microsoft.
Set as Homepage Link for bloggers
Now a days you see many leading sites with link displaying Set as Homepage. this is an good think to do with if your visitors make your site as an homepage whenever they open the browser your page will display as well as it will increase you blogs rank.
How to add this Link?
1. You can add it by selecting the Add HTML/JAVASCRIPT.
2. By Putting in the Body tag.
You have to put the Following code:
<a href=”#” onclick=”this.style.behavior=’url(#default#homepage)’;this.setHomePage(‘http://riteshsanap4u.blogspot.com‘);”>Click here to make Tips and Ticks your default homepage</a>
the Text Shown in red color is the text you have to put for diplay. and the text in Green color is the Link of your site.
Team Viewer
![]() Friends today my friend was having problem in editing his template. So he told me to edit his template then i told him how can i edit his template without signing in with his account he told me to download that software and we got connected i get shocked i liked the software very much.
Friends today my friend was having problem in editing his template. So he told me to edit his template then i told him how can i edit his template without signing in with his account he told me to download that software and we got connected i get shocked i liked the software very much.
After Downloading it you can install or directly run it . User of both pc gets an unique id if you want your friend should see your desktop then your friend required your id and password.
Preview:

Read More hack for Blogger with automatic Thumbnail creator script
You have seen many a times the Read More Widget made by Hackosphere was very popular but was not able complete most of needs.
1. Major Problem
we have to add this code always.
Type your summary here
<span id=”fullpost”>
Type rest of the post here
</span>
2. This feature can be available only for future posts.
That is if you already have 50 posts in your blog and then after that you are adding this hack to your template then you need to add the above tag in each and every previous 50 posts to make this hack working. But it’s a tedious process.
3. Can’t create Thumbnails automatically
This hack can’t create automatic thumbnails for posts.
Now a new version has been developed by my blogger friends. I would like to share that new version of read more hack with you all.
Read More hack with automatic Thumbnail creator script
This hack has overcome all the drawbacks of the previous version of read more hack. This hack is developed by Blogsphera . ( Translated version ).
Let’s see the installation instructions :
Adding the Javascript
To add the javascript files to the header , first login to your blogger account. Then navigate to Layout section of your blog and then move to EDIT HTML sub tab and check ” Expand Widget Templates ” option in the edit html page.
There search for this tag : </head>
Now place the following code above that tag </head> :
<SCRIPT type=’text/javascript’> var thumbnail_mode = "no-float" ; summary_noimg = 500; summary_img = 400; img_thumb_height = 130; img_thumb_width = 281; </SCRIPT> <SCRIPT src=’http://www.smashingtips.com/wp-content/uploads/2009/05/read-more.js’ type=’text/javascript’/>
Then Add This Code
search for this tag <p><data:post.body/></p> or <data:post.body/>
Now replace that whole tag with the code below :
<b:if cond=’data:blog.pageType == "item"’>
<p><data:post.body/></p>
<b:else/><DIV expr:id=’"summary" + data:post.id’><p><data:post.body/></p></DIV> <SCRIPT type=’text/javascript’>createSummaryAndThumb("summary<data:post.id/>");</SCRIPT> <div style=’clear: both;’/> <div style=’border:0px;padding-top:5px;;float:right;text-align:right;’><span class=’readon’><a expr:href=’data:post.url’ rel=’bookmark’><img src=’http://i422.photobucket.com/albums/pp302/bloggeracs/ReadMore.png‘/></a></span></div>
</b:if>
You can now preview your template and then save it.
Customizing The code
Now let us see how to customize the code to suit your style :
- var thumbnail_mode = “no-float”;
- summary_noimg = 500 ;
- summary_img = 400 ;
- img_thumb_height = 130;
- img_thumb_width = 281 ;
By default i have selected no-float. That the image will be unformatted. If you want the thumbnail to be shown only on left use the option ” float ” instead of “no-float”.
This code will decide how much characters must be shown in the post if that post doesn’t contain any images. I have selected 500 characters.. you can customize it to suit ur template.
If the post contains image , then this code will decide how many characters must be shown in that post. Change the number of characters to be shown to suit your template.
This tag decides the height of the thumbnail to be shown in the post. Vary the number 130 to suit your template.
This tag decides the width of the Thumbnail image to be shown
Adding read more image
The author of this hack haven’t included any read more buttons in this hack. But I have modified the code and have included a image to link to the full post.
http://i422.photobucket.com/albums/pp302/bloggeracs/ReadMore.png
If you want to change the image then replace the url of the image with your own image
or if you don’t need any read more button , then replace the code in final step to this one :
<b:if cond=’data:blog.pageType == “item”‘>
<p><data:post.body/></p>
<b:else/><DIV expr:id='”summary” + data:post.id’><p><data:post.body/></p></DIV> <SCRIPT type=’text/javascript’>createSummaryAndThumb(“summary<data:post.id/>”);</SCRIPT> <div style=’clear: both;’/><div style=’border:0px;padding-top:5px;;float:right;text-align:right;’><span class=’readon’><a expr:href=’data:post.url’ rel=’bookmark’>Read More…</a></span></div>
</b:if>
change the tag in red to suit your style.
source :http://www.techieblogger.com/