Hello to all my visitors . Today morning I saw a comment on trily – blogger template.That my visitor cryptoGATO wanted to add this own favicon instead of default blogger favicon. so this is my todays topic so i m going to tell to you all how to do it. I think you might have seen my favicon Generator that i have made for you all.
So now lets get started :
- Login to your blogger dashboard
- Click on Design
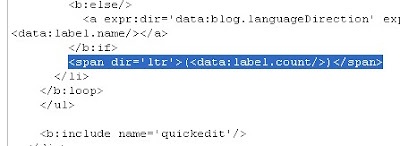
- Click on Edit HTML
- Find this <b:skin><