Best 2 Know

The Ultimate Blogging Resource

  • Advertising
  • WebHosting
  • Contact Us
  • Blogger
    • Blogger Templates
    • Blogger Tutorials
  • Browser
    • Firefox
    • Google Chrome
  • Google
  • Internet
    • Facebook
    • Twitter
  • Thesis
  • Windows
  • WordPress
    • WordPress Themes
    • WordPress Plugins
  • More
    • Linux
    • Review
    • Solutions
    • Announcements

Tag: Blogger Hacks

Blogger Showing Bx Error? What To Do? (Complete Solution For Fix Bx Error In Blogger)

Today When I am Customizing Best2know.info Blogger Showing This bx-gkpps Error.Then I am Trying To Solve it And If You Have Blog On Blogger Then you might have face any bx error so i am Sharing this solution on how to slove bx errors in blogger blog.

Step To Solve Bx Errors In Blogger Blog :-

1. Change the browser. Simply, try the same thing from different browser (Opera recommended)
2. Delete all the widgets of your current template before uploading a new one (ofcourse, make a backup).
3. Delete Browser cookies and try again.
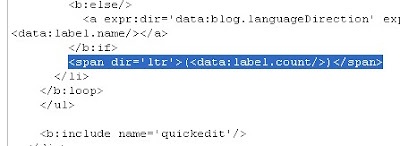
4. Remove widget codes manually of the template you are trying to install. For example : from to
5.  Just wait for sometime and try later.
6. Contact Blogger if it continues.

Then You Are Done

Keep Visiting And Subscribe For Other Latest Blogger Hacks,Blogger Tips,Blogger Seo And Much More.

May 10, 2010 Ritesh Sanap Blogger Blogger Hacks, Blogger Problems

Add/Remove page/Post View Counter Widget For Blogger

Most of you are always thinking of a way to track that how many times is your posts or articles on your blog are viewed. Blogger a major free blog hosting provider does not have a individual post views counter widget like other blogging platforms, wordpress have. This is new improved version must work smoothly for all blogger blogs.

 
Features Added
  • New code makes Faster loading
  • Post views shown as image rather than text
  • You can show counter on Homepage too.
  • No ads at all. Advert Free.


How To install individual Page views counter widget for Blogger ??
Step#1 Log into your Blogger dashboard. Go to layout and than click on edit/html
Now check on expand widget content , than find the bellow code

<div class=’post-header-line-1′>

 and paste the bellow code after the above line

<b:if cond=’data:blog.pageType == &quot;item&quot;’><img height=’16’ src=’http://forums.bit-tech.net/images-light/misc/stats.gif’ width=’16’/><img alt=’counter’ expr:src=’&quot;http://demo.bloggerwidgets.cz.cc/counter.php?page=&quot; + data:post.id + &quot;&amp;digit=4&quot;’/>  <b>Views</b><b:else/><img height=’16’ src=’http://forums.bit-tech.net/images-light/misc/stats.gif’ width=’16’/><img alt=’counter’ expr:src=’&quot;http://demo.bloggerwidgets.cz.cc/counter2.php?page=&quot; + data:post.id + &quot;&amp;digit=4&quot;’/>  <b>Views</b></b:if>

Save your template and your new individual post views counter widget is ready

May 8, 2010 Ritesh Sanap Uncategorized Advert, blog, Blog Design Series, Blogger Hacks, code lt, cond, counter php, div class, expr, free blog, gif width, header line, Homepage, img, img height, quot, version, View, Widget

Hide or Show Label Count In Blogger

I Know Many Of You Have Tried Label Widget in Blogger. And You Know That Blogger Is Displaying Label Count Some people prefer not to display the label count in their blogs as it looks a bit unprofessional. Lets say if you have a label ‘Funny sms’ with 50 label count and another one ‘ Good morning sms’ with 2 as label count… less people will show interest on clicking the second one.

 So, lets see how to hide or remove the Label count in your blogger blog(s)…

1. Sign into Blogger dashboard » Layout » Edit html

Tick the expand widget templates and remove this line from the template..

<span dir=’ltr’>(<data:label.count/>)</span>

2. Save Changes

You Are Done!!

May 2, 2010 Ritesh Sanap Uncategorized Blog Design Series, Blogger Hacks, Customization, Tutorials

Add Social Bookmarking Icons After Every Post In Blogger Blog

Hi Friends

I Am Coming This Time With New Set of social bookmarking icons set for blogger blog.many of our readers have problem to add social bookmarking icons after every post in blogger so i am giving this hack to add social bookmarking icons after every post in blogger blog.we have also covered

And I am Requesting You To Help to Share our post on social bookmarking site

Now Come on step to add this icon pack  to your blog.

Step:-1
Goto Blogger Template>Edit HTML back up your template and expand the widget templates.

Step:-2
Now in your template find  

</head>
and just above that paste the following code 
<script src=’http://blogger-plugins.googlecode.com/files/bkmrk_hover.js’></script>
<style type=’text/css’> .bookmark img { border: 0; padding:0px; } .bookmark a:hover { position: relative; top: 1px; left: 1px; } </style>  


Step:-3
Now Find
<p class=’post-footer-line post-footer-line-3′>
 Or  If That Is Not There Then Find
<div class=’post-footer-line post-footer-line-3′>

And Replace with
!– Social Bookmarking Icons Start  www.best2know.info–>
<span class=’bookmark’><table align=’left’ border=’0′ cellpadding=’0′ width=’100%’><tr><td style=’vertical-align:middle’ valign=’middle’ width=’30%’><div expr:id=’&quot;sbtxt&quot;+data:post.id’>Bookmark this post:<span style=’display:none’><a href=’http://www.bloggerplugins.org’>blogger tutorials</a> <a href=’http://www.bloggerplugins.org/2007/09/social-bookmarking-elements-after-each.html’>Social Bookmarking   Blogger Widget</a></span></div><script type=’text/javascript’>showsbtext(&quot;sbtxt&quot; + &quot;<data:post.id/>&quot;,0)</script></td><td><a expr:href=’&quot;http://www.stumbleupon.com/submit?url=&quot; + data:post.url + &quot;&amp;title=&quot; + data:post.title’ expr:onmouseout=’&quot;javascript:showsbtext(\&quot;sbtxt&quot; + data:post.id + &quot;\&quot;,0);&quot;’ expr:onmouseover=’&quot;javascript:showsbtext(\&quot;sbtxt&quot; + data:post.id + &quot;\&quot;,19);&quot;’ rel=’nofollow’ target=’_blank’><img alt=’StumpleUpon’ src=’http://lh4.ggpht.com/_u4gySN2ZgqE/SnVFoJLmchI/AAAAAAAAAjg/-2mcU8UjohA/icon_sb_stumb.gif%5B4%5D.png?imgmax=800’/></a> <a expr:href=’&quot;http://digg.com/submit?phase=3&amp;url=&quot; + data:post.url’ expr:onmouseout=’&quot;javascript:showsbtext(\&quot;sbtxt&quot; + data:post.id + &quot;\&quot;,0);&quot;’ expr:onmouseover=’&quot;javascript:showsbtext(\&quot;sbtxt&quot; + data:post.id + &quot;\&quot;,1);&quot;’ rel=’nofollow’ target=’_blank’><img alt=’DiggIt!’ src=’http://lh5.ggpht.com/_u4gySN2ZgqE/SnVFiI7X5sI/AAAAAAAAAjE/uoviRb4H0V8/icon_sb_dig%5B4%5D.gif?imgmax=800’/></a> <a expr:href=’&quot;http://del.icio.us/post?url=&quot; + data:post.url + &quot;&amp;title=&quot; + data:post.title’ expr:onmouseout=’&quot;javascript:showsbtext(\&quot;sbtxt&quot; + data:post.id + &quot;\&quot;,0);&quot;’ expr:onmouseover=’&quot;javascript:showsbtext(\&quot;sbtxt&quot; + data:post.id + &quot;\&quot;,2);&quot;’ rel=’nofollow’ target=’_blank’><img alt=’Del.icio.us’ src=’http://lh4.ggpht.com/_u4gySN2ZgqE/SnVFhIJeylI/AAAAAAAAAjA/efK7u8suKvs/icon_sb_del%5B4%5D.gif?imgmax=800’/></a> <a expr:href=’&quot;http://www.blinklist.com/index.php?Action=Blink/addblink.php&amp;Description=&amp;Url=&quot; + data:post.url + &quot;&amp;Title=&quot; + data:post.title’ expr:onmouseout=’&quot;javascript:showsbtext(\&quot;sbtxt&quot; + data:post.id + &quot;\&quot;,0);&quot;’ expr:onmouseover=’&quot;javascript:showsbtext(\&quot;sbtxt&quot; + data:post.id + &quot;\&quot;,3);&quot;’ rel=’nofollow’ target=’_blank’><img alt=’Blinklist’ src=’http://lh5.ggpht.com/_u4gySN2ZgqE/SnVFgIXzFNI/AAAAAAAAAi8/Vgqkftp6mvk/icon_sb_bli%5B4%5D.gif?imgmax=800’/></a> <a expr:href=’&quot;http://myweb2.search.yahoo.com/myresults/bookmarklet?u=&quot; + data:post.url + &quot;&amp;=&quot; + data:post.title’ expr:onmouseout=’&quot;javascript:showsbtext(\&quot;sbtxt&quot; + data:post.id + &quot;\&quot;,0);&quot;’ expr:onmouseover=’&quot;javascript:showsbtext(\&quot;sbtxt&quot; + data:post.id + &quot;\&quot;,4);&quot;’ rel=’nofollow’ target=’_blank’><img alt=’Yahoo’ src=’http://lh3.ggpht.com/_u4gySN2ZgqE/SnVFqxs6oCI/AAAAAAAAAjs/s3Gqfd7n0KQ/icon_sb_yah%5B4%5D.gif?imgmax=800’/></a> <a expr:href=’&quot;http://www.furl.net/storeIt.jsp?u=&quot; + data:post.url + &quot;&amp;t=&quot; + data:post.title’ expr:onmouseout=’&quot;javascript:showsbtext(\&quot;sbtxt&quot; + data:post.id + &quot;\&quot;,0);&quot;’ expr:onmouseover=’&quot;javascript:showsbtext(\&quot;sbtxt&quot; + data:post.id + &quot;\&quot;,8);&quot;’ rel=’nofollow’ target=’_blank’><img alt=’Furl’ src=’http://lh6.ggpht.com/_u4gySN2ZgqE/SnVFiyVxsBI/AAAAAAAAAjI/Zwu2964qKmg/icon_sb_fur%5B4%5D.gif?imgmax=800’/></a> <a expr:href=’&quot;http://www.technorati.com/cosmos/search.html?url=&quot; + data:post.url’ expr:onmouseout=’&quot;javascript:showsbtext(\&quot;sbtxt&quot; + data:post.id + &quot;\&quot;,0);&quot;’ expr:onmouseover=’&quot;javascript:showsbtext(\&quot;sbtxt&quot; + data:post.id + &quot;\&quot;,9);&quot;’ rel=’nofollow’ target=’_blank’><img alt=’Technorati’ src=’http://lh3.ggpht.com/_u4gySN2ZgqE/SnVFpG5R_SI/AAAAAAAAAjk/-cFqb1ngIIA/icon_sb_tec%5B4%5D.gif?imgmax=800’/></a> <a expr:href=’&quot;http://www.simpy.com/simpy/LinkAdd.do?href=&quot; + data:post.url + &quot;&amp;title=&quot; + data:post.title’ expr:onmouseout=’&quot;javascript:showsbtext(\&quot;sbtxt&quot; + data:post.id + &quot;\&quot;,0);&quot;’ expr:onmouseover=’&quot;javascript:showsbtext(\&quot;sbtxt&quot; + data:post.id + &quot;\&quot;,10);&quot;’ rel=’nofollow’ target=’_blank’><img alt=’Simpy’ src=’http://lh6.ggpht.com/_u4gySN2ZgqE/SnVFmiSmYfI/AAAAAAAAAjY/oy9Mov0ttUA/icon_sb_sim%5B4%5D.gif?imgmax=800’/></a> <a expr:href=’&quot;http://www.spurl.net/spurl.php?url=&quot; + data:post.url + &quot;&amp;title=&quot; +  data:post.title’ expr:onmouseout=’&quot;javascript:showsbtext(\&quot;sbtxt&quot; + data:post.id + &quot;\&quot;,0);&quot;’ expr:onmouseover=’&quot;javascript:showsbtext(\&quot;sbtxt&quot; + data:post.id + &quot;\&quot;,11);&quot;’ rel=’nofollow’ target=’_blank’><img alt=’Spurl’ src=’http://lh6.ggpht.com/_u4gySN2ZgqE/SnVFnSDDHYI/AAAAAAAAAjc/rreFKKk8y84/icon_sb_spu%5B4%5D.gif?imgmax=800’/></a> <a expr:href=’&quot;http://reddit.com/submit?url=&quot; + data:post.url + &quot;&amp;title=&quot; + data:post.title’ expr:onmouseout=’&quot;javascript:showsbtext(\&quot;sbtxt&quot; + data:post.id + &quot;\&quot;,0);&quot;’ expr:onmouseover=’&quot;javascript:showsbtext(\&quot;sbtxt&quot; + data:post.id + &quot;\&quot;,17);&quot;’ rel=’nofollow’ target=’_blank’><img alt=’Reddit’ src=’http://lh4.ggpht.com/_u4gySN2ZgqE/SnVFlgfMydI/AAAAAAAAAjU/s6JQW7sjXGQ/icon_sb_red%5B4%5D.gif?imgmax=800’/></a> <a expr:href=’&quot;http://www.google.com/bookmarks/mark?op=add&amp;bkmk=&quot; + data:post.url +  &quot;&amp;title=&quot;+data:post.title’ expr:onmouseout=’&quot;javascript:showsbtext(\&quot;sbtxt&quot; + data:post.id + &quot;\&quot;,0);&quot;’ expr:onmouseover=’&quot;javascript:showsbtext(\&quot;sbtxt&quot; + data:post.id + &quot;\&quot;,20);&quot;’ rel=’nofollow’ target=’_blank’><img alt=’Google’ src=’http://lh4.ggpht.com/_u4gySN2ZgqE/SnVFj9KzF0I/AAAAAAAAAjM/JuLU-525wD8/icon_sb_goo%5B4%5D.gif?imgmax=800’/></a>
<script charset=’utf-8′ src=’http://bit.ly/javascript-api.js?version=latest&amp;login=tweettrackjs&amp;apiKey=R_7e9987b2fd13d7e4e881f9cbb168f523′ type=’text/javascript’/>
 <a expr:href=’&quot;http://api.tweetmeme.com/share?url=&quot;+data:post.url’  expr:onmouseout=’&quot;javascript:showsbtext(\&quot;sbtxt&quot; + data:post.id + &quot;\&quot;,0);&quot;’ expr:onmouseover=’&quot;javascript:showsbtext(\&quot;sbtxt&quot; + data:post.id + &quot;\&quot;,21);&quot;’ rel=’nofollow’ target=’_blank’><img alt=’Twitter’ src=’http://lh5.ggpht.com/_u4gySN2ZgqE/SnVFp0q8DWI/AAAAAAAAAjo/ZajyLZ5HqSY/icon_sb_twitter%5B4%5D.png?imgmax=800’/></a> <a expr:href=’&quot;http://www.facebook.com/sharer.php?u=&quot; + data:post.url’ expr:onmouseout=’&quot;javascript:showsbtext(\&quot;sbtxt&quot; + data:post.id + &quot;\&quot;,0);&quot;’ expr:onmouseover=’&quot;javascript:showsbtext(\&quot;sbtxt&quot; + data:post.id + &quot;\&quot;,22);&quot;’ rel=’nofollow’ target=’_blank’><img alt=’FaceBook’ src=’http://3.bp.blogspot.com/_u4gySN2ZgqE/Snq8BsUw8pI/AAAAAAAAAnM/T1ggoBrv6tk/s400/fbicon.png’/></a>
</td>
</tr>
</table><br/>
</span>
<!– Social Bookmarking Icons End  www.best2know.info–>
Then You Are Done!!!!!


April 29, 2010 Ritesh Sanap Uncategorized Blog Beginner Series, Blogger Hacks, Social Bookmarking

Tool tip or hint widget for blogger

Tool tip can be very useful in terms of site navigation. I searched for pure css tool tips but all in vain. Most of the tutorials, available online, use JavaScript which slows down the loading time of the page. So, I decided to write a tutorial about designing a pure css based tool tip for Blogger.

What is tooltip?

As per Wikipedia: The tooltip is a common graphical user interface element. It is used in conjunction with a cursor, usually a mouse pointer. The user hovers the cursor over an item, without clicking it, and a small “hover box” appears with supplementary information regarding the item being hovered over.

Demo: Hover over here Tool tip text appears here

Blogger hack by Ritesh Sanap.

This tooltip works with all browsers. Liked it? Just follow the instruction given below and start using it on your blog.

  1. Login to your blogger dashboard.
  2. Find </b:skin>
  3. Just above the code add the CSS given below :
    a.tip {position:relative;}
    a.tip span {display: none; position: absolute; top: auto; left: auto; padding: 5px 5px 5px 5px; z-index: 100; background-color: #000; color: #fff; border:0px solid #777; width:200px; height:auto; -moz-border-radius: 2px; -webkit-border-radius: 2px;}
    a:hover.tip {font-size: 99%;cursor:pointer;}
    a:hover.tip span {display: block;position: absolute;-moz-opacity: 0.7;
    opacity:0.7; top:auto; left:auto; right:2px; bottom:auto; line-height:14px; font-size:12px;font-weight:normal;}
  4. You Have Successfully Installed the widget.

How to Use this widget?

Check the following example.

<a class=’tip’ href=’#’>more<span>tool tips text area. know more..</span></a>

In the above code, “more” is the link. When you hover over more, the tool tip appears. The text between span tags is what appears in the tool tip.

Example :moretool tips text area. know more.

April 20, 2010 Ritesh Sanap Blogger Tutorials Blogger Hacks

Facebox – Facebook Styled Lightbox

Facebox is really an awesome creation using jQuery. it can be used for many purposes such such as displaying images in a fancy or cool manure . we have covered many Facebook Tips and Tricks.its really an awesome creation.Facebox is a lightweight Facebook-style lightbox which can display images, divs, or entire remote pages (via Ajax) inline on the page and on demand. It uses the compact jQuery library as its engine, unlike Lightbox v2.0, which uses Prototype.

Facebox consists of 2 .js files, 1 .css file and some images that make up its interface (such as round corner images). I have zipped the files together.


Click here to download the files

Download these files and upload to your server or any hosting or google account. After Downloading these files edit Facebox.css as per you blog requirement( If you don’t know how to do it, then ask me!!) and replace image sources of images(i.e. b.png, bl.png, br.png, tl.png and tr.png). Now, replace image sources in Facebox.js (i.e. closelabel.gif and loading.gif).

Are you confused?? If yes then leave a comment, i will explain you how to replace image sources.

Now, follow these steps:

  1. Go to Layout section and then open Edit html. Click on Download Full Template to take the backup of your current template(don’t miss this, else things may go haywire!!). Now, Check the box to Expand Widget Templates. Insert the following code in the Head Section. I would Suggest you to paste the code just above . 
    <script src=’‘ type=’text/javascript’/><link href=’‘ media=’screen’ rel=’stylesheet’ type=’text/css’/><script src=’‘ type=’text/javascript’/><script type=’text/javascript’> jQueryundefineddocument).readyundefinedfunctionundefined$) { $undefined’a[rel*=facebox]’).faceboxundefined) })</script><style type=’text/css’>.thickstyle{background: silver;}</style>

    Change the web address in red, if you have uploaded above files on your server or googlepage and Save the Template.

  2. Now its the time to explain how and where to use Facebox. 
    1. Display an image using Facebox: If you want to display images using facebox, use the following code: 
      <p><a href=”http://3.bp.blogspot.com/_nX0wvumD9VU/S81K21P3STI/AAAAAAAAAao/p66UQf6Qhgo/s1600/logo.png” rel=”facebox”> Best 2 know</a></p>

      Result of the above Code :

      Best 2 know

      Click on the above link for results.

      If you are using this scrip in a menu then, remove <p></p>

    2. FaceBox used to display an inline DIV: This is the most useful code. It can be used to display text notes, announcement, disclaimer, contact form and so on… In this case a link is placed on your blog and when you click on that link, the pop up (like facebook) appears. 

      <p><a href=”#mydiv” rel=”facebox”>View DIV with id=”mydiv” on the page</a></p><div id=”mydiv” style=”display:none”>This is the contents of a hidden DIV on the blog, with ID=”mydiv” and style set to “display:none” <br /><a href=”http://www.dynamicdrive.com”>Dynamic Drive</a></div>

      The Result of the above code :

      View DIV with id=”mydiv” on the page

      This is the contents of a hidden DIV on the blog, with ID=”mydiv” and style set to “display:none”

      Dynamic Drive

      Click on the above link and see the result.

    3. FaceBox used to display an external page, plus apply a CSS class to the container (to further style it): It is like previous one only, but with more styling is added to the pop up.
      <style type=”text/css”>.thickstyle{background: silver;}</style>”<p><a href=”http://www.best2know.info/2006/04/contact-us.html” rel=”facebox[.thickstyle]”>View “Contact Us page” fetched via Ajax, further styled with “.thickstyle” CSS class</a></p>

      The Result for above code :

      ”

      View “Contact Us page” fetched via Ajax, further styled with “.thickstyle” CSS class

      Click the above link for result.
      If it the pop up does not appear after following these steps.. reload the page twice and check again. Remove <p></p> and check, it should work.
      Note: Set href attribute to point to either an image, the ID of a hidden DIV, or a URL to the page on your blog only. Do not point it to any external link. It will not Work, if you do so.

so did you like it? Any doubts or questions? Leave a comment, i will surely help you…

April 20, 2010 Ritesh Sanap Blogger Tutorials Blogger Hacks, Jquery

You might also like this Widget for blogger or Related post widget


Displaying the links to related posts along with a thumbnail of the corresponding post will help you increase the page views/user .Users will be tempted to go for the related posts when they are presented attractively with thumbnails.
So you are tempted to add this widget then follow this steps:

  1. Login in to your Blogger Account.
  2. From Dashboard Click on Layout and the Click on Edit HTML.
  3. Then Check the “Expand Widget Templates“.
  4. Find </head> .
  5. Then Before  </head> Paste the following Code.
    <!--Related Posts with thumbnails Scripts and Styles Start-->
    <!-- remove --><b:if cond='data:blog.pageType == &quot;item&quot;'>
    <style type="text/css">
    #related-posts {
    float:center;
    text-transform:none;
    height:100%;
    min-height:100%;
    padding-top:5px;
    padding-left:5px;
    }
    
    #related-posts h2{
    font-size: 1.6em;
    font-weight: bold;
    color: black;
    font-family: Georgia, &#8220;Times New Roman&#8221;, Times, serif;
    margin-bottom: 0.75em;
    margin-top: 0em;
    padding-top: 0em;
    }
    #related-posts a{
    color:black;
    }
    #related-posts a:hover{
    color:black;
    }
    
    #related-posts  a:hover {
    background-color:#d4eaf2;
    }
    </style>
    <script type='text/javascript'>
    var defaultnoimage="http://1.bp.blogspot.com/_u4gySN2ZgqE/SosvnavWq0I/AAAAAAAAArk/yL95WlyTqr0/s400/noimage.png";
    var maxresults=5;
    var splittercolor="#d4eaf2";
    var relatedpoststitle="Related Posts";
    </script>
    <script src='http://best2know.googlecode.com/files/related-posts-with-thumbnails-for-blogger.js' type='text/javascript'/>
    <!-- remove --></b:if>
    <!--Related Posts with thumbnails Scripts and Styles End-->
  6. Now Find
    <div class=’post-footer-line post-footer-line-1′>.
  7. Now immediately below that line add this code.
    <!-- Related Posts with Thumbnails Code Start-->
    <!-- remove --><b:if cond='data:blog.pageType == "item"'>
    <div id='related-posts'>
    <b:loop values='data:post.labels' var='label'>
    <b:if cond='data:label.isLast != "true"'>
    </b:if>
    <script expr:src='"/feeds/posts/default/-/" + data:label.name + "?alt=json-in-script&amp;callback=related_results_labels_thumbs&amp;max-results=6"' type='text/javascript'/></b:loop>
    <script type='text/javascript'>
    removeRelatedDuplicates_thumbs();
    printRelatedLabels_thumbs("<data:post.url/>");
    </script>
    </div><div style='clear:both'/>
    <br/>
    <a href="http://www.best2know.info/2010/04/you-might-like-this-widget-for-blogger.html" target="_blank"><b>Grab This Widget</b></a>
    <!-- remove --></b:if>
    <!-- Related Posts with Thumbnails Code End-->
    [Re:FIXED]
  8. You can adjust the maximum number of related posts being displayed by editing this line in the code.
    var maxresults=5;
  9. To edit the title of the widget you can change this line of code.var relatedpoststitle=”Related Posts”;
  10. To change the default thumbnail, you can edit this line of code.
    var defaultnoimage=”http://1.bp.blogspot.com/_u4gySN2ZgqE/SosvnavWq0I/AAAAAAAAArk/yL95WlyTqr0/s400/noimage.png”;
  11. To Change the Colour of the Splitter Line , edit.
    var splittercolor=”#d4eaf2″;

To change the other colours and all you will have to modify the CSS

If you fall into troubles implementing this,don’t panic.. :) .just leave me a comment here and i will help you out. If you like to give me any suggestions on how to improve this widget,then it would be really great.

How to display the related posts on every page and not only on the post pages?

Just remove the two lines starting with <!– remove –> from both step 5 and step 7.

that is lines

<!– remove –><b:if cond=’data:blog.pageType == &quot;item&quot;’>

and

<!– remove –></b:if>

After listening to the comments by all of our visitors this code has been updated.

April 20, 2010 Ritesh Sanap Blogger Tutorials blogger account, Blogger Hacks, code lt, div class, div id, javascript, script src http, text, var, Widget

Jquery – Create Float Menu with Scroll Follow Effect

Hi! My name is Rizqy and I’m new as writer in this blog. Thanks to Ritesh for make me a writer. In this blog, I’ll write about javascript especially jquery, tips-trick windows, and maybe the other. In this occasion I’ll write about jquery javascript framework. Jquery is one of the most popular javascript framework. It has many plugin that we can use freely to beautify our blog or website.

Now I’ll share how to make a float menu with touching of jquery effect. The example of float menu we can see at http://spenasa-blogger.blogspot.com. Look at the left side, you will find a float menu with some menu of course. If we scroll the page, that menu will look like follow our scroll. We will use Jquery Scrool Follow plugin for this. You can go to the documentation page of this plugin at http://kitchen.net-perspective.com/open-source/scroll-follow.

Javascript

To use the plugins from Jquery, we must add the library script from jquery. Find </head> and paste the script below.

<script src=’http://ajax.googleapis.com/ajax/libs/jquery/1.3.2/jquery.min.js’ type=’text/javascript’/>

After that, add the script below. This script is the core of the jquery scroll follow and Jquery UI.

<script src=’http://mbahrizh.googlecode.com/files/jquery.scrollfollow.js’ type=’text/javascript’/>

<script src=’http://mbahrizh.googlecode.com/files/jquery-ui-1.7.2.custom.min.js’ type=’text/javascript’/>

Also add this script. This script for call the scroll follow effect.

<script type=’text/javascript’>
$( document ).ready( function ()
{
$( ‘#floatmenu’ ).scrollFollow();
}
);
</script>

CSS

This is the basic CSS. You can costumize it as your desire. Add the CSS below before ]]></b:skin>.

#floatmenu {background:#FFF; border: 2px solid #088A08; position: absolute; width: 40px; height: 200px; color: rgb(102, 102, 102); font-size: 12px; top: 100px; left: 0px; z-index: 1;}

HTML

Basicly, you just add a <div> tag after <body> tag. You’re free to choose your menu content. You can give your facebook, twitter, or the other.

<div id=’floatmenu’>
<!– The menu content is here… –>
</div>

That’s all my first post. In another time, I’ll write about the other jquery effects. I hope you enjoy it.

April 19, 2010 Ritesh Sanap Blogger Tutorials Blogger Hacks, Jquery, Social Bookmarking

Posts pagination

Previous page Page 1 Page 2 Page 3 Page 4 … Page 6 Next page

Currently Trending

  • How to download Specific parts of YouTube videos
    How to download Specific parts of YouTube videos
  • Windows Vista CD key
    Windows Vista CD key
  • How to retrieve my Demonoid username
    How to retrieve my Demonoid username
  • How to add Logo to Thesis theme
    How to add Logo to Thesis theme
  • How to Delete Feedbacks from JetPack Contact Form
    How to Delete Feedbacks from JetPack Contact Form
  • List Of All 255 Keyboard All Alt Key Codes
    List Of All 255 Keyboard All Alt Key Codes
  • h4x0r ( Hacker ) - Blogger Template
    h4x0r ( Hacker ) - Blogger Template

Get Latest post in your Inbox

Random Posts

How to Remove Read More jump

June 21, 2011 By Ritesh Sanap Leave a Comment

Eleven Best free Photo/Pics Editors – Which To Choose ??

July 13, 2008 By Ritesh Sanap 1 Comment

NETBIOS TRICK : Hack your victim online

February 28, 2009 By Ritesh Sanap Leave a Comment

Leviathan – Blogger Template

July 16, 2010 By Ritesh Sanap 2 Comments

Find Location, Operating System, Browser Details Of Anyone On Internet With This Simplest Method

February 27, 2009 By Ritesh Sanap Leave a Comment

WordPress

HTTP2 Server Push for W3 Total Cache Minify plugin

August 17, 2016 By Ritesh Sanap 5 Comments

How to Disable Emojis in WordPress

January 6, 2016 By Ritesh Sanap Leave a Comment

JetPack Related posts and Sharing not working with NGINX

November 10, 2015 By Ritesh Sanap Leave a Comment

Simply Pure – WordPress Theme

November 2, 2014 By Ritesh Sanap 2 Comments

Advanced What should we Write about next? – WordPress Plugin

July 28, 2014 By Ritesh Sanap Leave a Comment

How to Disable Self Pingback or TrackBack

January 16, 2014 By Ritesh Sanap Leave a Comment

BlueStrap – WordPress Theme

January 1, 2014 By Ritesh Sanap 15 Comments

How to Create Multiple Excerpts in WordPress

December 24, 2013 By Ritesh Sanap Leave a Comment

How to Disable Auto Update in WordPress

November 21, 2013 By Ritesh Sanap Leave a Comment

How to Delete Feedbacks from JetPack Contact Form

November 19, 2013 By Ritesh Sanap 9 Comments

Recent Posts

  • HTTP2 Server Push for W3 Total Cache Minify plugin
  • How to show hidden files and folders in Mac OS X
  • How to Disable Emojis in WordPress
  • Canva – Online Photo Editor
  • JetPack Related posts and Sharing not working with NGINX

Archives

Recommends

  • DigitalOcean – Cloud Hosting
  • Dropbox – Cloud Storage
  • Elegant Themes – WordPress Themes
  • LastPass – Password Manager
  • Like us on Facebook
  • Follow on Twitter
  • +1 on Google
  • Subscribe via Email
  • RSS Feed

© 2025 Best 2 Know · All Rights Reserved · We ♥ DigitalOcean