Best 2 Know

The Ultimate Blogging Resource

  • Advertising
  • WebHosting
  • Contact Us
  • Blogger
    • Blogger Templates
    • Blogger Tutorials
  • Browser
    • Firefox
    • Google Chrome
  • Google
  • Internet
    • Facebook
    • Twitter
  • Thesis
  • Windows
  • WordPress
    • WordPress Themes
    • WordPress Plugins
  • More
    • Linux
    • Review
    • Solutions
    • Announcements

How to display or show comment-author’s profile image in Blogger/BlogSpot blogs

Here’s another useful tip for those bloggers, who are continuously trying to transform their free BlogSpot blogs into a pro-blog.
Through this hack, within 10 minutes you can start showing the images of commentators/comment-authors in your blog.

See the image below; how it will look after tweaking the HTML default code

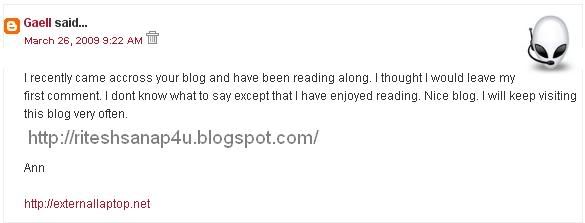
To do so, first of all log in to Blogger
Now go to Layout, then click on Edit HTML tab.
Now Download the present template as a back up
Then click on “Expand widget templates“

Now search (CTRL+F) this

</head>

Immediately BEFORE IT, paste this:

<!–COMMENT-AUTHOR-PICTURE-STARTS–><script src=’http://dsai.588.googlepages.com/blogger_comment_author_photos.js’ type=’text/javascript’/>
<script type=’text/javascript’>
//<![CDATA[
addLoadEventundefinedfunctionundefined){showCommentPhotosundefined’commentphoto’,’comment-author’, 1);});
//]]>
</script><!–COMMENT-AUTHOR-PICTURE-STOPS–>


NOW see this code below:

<dl id=’comments-block’>
<b:loop values=’data:post.comments’ var=’comment’>
<dt class=’comment-author’ expr:id='”comment-” + data:comment.id’>

<div class=’commentphoto’ style=’float:right;’/>

<a expr:name='”comment-” + data:comment.id’/>

<b:if cond=’data:comment.authorUrl’>

<a expr:href=’data:comment.authorUrl’ rel=’nofollow’><data:comment.author/></a>
<b:else/>
<data:comment.author/>
</b:if>
<data:commentPostedByMsg/>
</dt>
<dd class=’comment-body’>
<b:if cond=’data:comment.isDeleted’>
<span class=’deleted-comment’><data:comment.body/></span>
<b:else/>
<p><data:comment.body/></p>
</b:if>
</dd>
<dd class=’comment-footer’>
<span class=’comment-timestamp’>
<a expr:href='”#comment-” + data:comment.id’ title=’comment permalink’>
<data:comment.timestamp/>
</a>
<b:include data=’comment’ name=’commentDeleteIcon’/>
</span>
</dd>

<div style=’clear:both;’/>
</b:loop>

</dl>

In the code above YOU HAVE TO INSERT code lines shown in BLUE and BOLDED
And the red ones, are those which you can use as markers, BEFORE whom you have to paste the blue code lines.

You can change the position of pictures or images from Right to Light, by changing it in the first blue line in the code above…
Now whenever, people use their gmail or openid account to comment, then their pictures will be displayed alongside the comments !<>

Subscribe via Email

Share this:

  • Click to share on X (Opens in new window) X
  • Click to share on Facebook (Opens in new window) Facebook
  • Click to share on Pocket (Opens in new window) Pocket
  • Click to print (Opens in new window) Print
  • Click to share on WhatsApp (Opens in new window) WhatsApp
  • Click to email a link to a friend (Opens in new window) Email

Related

March 27, 2009 Ritesh Sanap Blogger Tutorials, Internet, Solutions Blogger Hacks, Hacks, Tutorials

Comments

  1. Adrian says

    April 3, 2009 at 11:32 pm

    A must for community blogs

    Reply
  2. Adrian says

    April 4, 2009 at 12:13 am

    hmmmm. i tried this one, the second code didnt look anything like mine.

    Reply
  3. JyotiAjay says

    May 21, 2009 at 1:14 pm

    hi,
    i tried following the method u explained above but the message is appearing like this .plz help

    Element type "dt" must be followed by either attribute specifications, ">" or "/>".

    Reply
  4. Ritesh Sanap says

    May 21, 2009 at 9:49 pm

    Can u give me your template code because i think their must be an modification so please let me see and i will tell you were to add

    Reply
  5. Sudeep says

    June 16, 2009 at 11:27 pm

    Does'nt work on me pls help me

    http://ctips4u.blogspot.com

    Reply
  6. Ritesh Sanap says

    June 17, 2009 at 10:01 pm

    @sudeep
    please try the code and understand it . it depends on the template code.

    Reply
  7. Phan D?ng says

    July 15, 2009 at 11:23 am

    test…

    Reply

Leave a ReplyCancel reply

This site uses Akismet to reduce spam. Learn how your comment data is processed.

Post navigation

Previous Previous post: How to show html text in blogger posts
Next Next post: Record a Screencast

Currently Trending

  • How to download Specific parts of YouTube videos
    How to download Specific parts of YouTube videos
  • Windows Vista CD key
    Windows Vista CD key
  • How to retrieve my Demonoid username
    How to retrieve my Demonoid username
  • How to add Logo to Thesis theme
    How to add Logo to Thesis theme
  • How to Delete Feedbacks from JetPack Contact Form
    How to Delete Feedbacks from JetPack Contact Form
  • List Of All 255 Keyboard All Alt Key Codes
    List Of All 255 Keyboard All Alt Key Codes
  • h4x0r ( Hacker ) - Blogger Template
    h4x0r ( Hacker ) - Blogger Template

Get Latest post in your Inbox

Random Posts

Hear FM in Gtalk

May 14, 2010 By Ritesh Sanap Leave a Comment

How to add Favorite Menu in WordPress

August 21, 2011 By Ritesh Sanap 1 Comment

How to download torrents without utorrent

May 11, 2011 By Ritesh Sanap Leave a Comment

Notepad Tricks – Part 1

July 7, 2008 By Ritesh Sanap Leave a Comment

NeoClassical Blogger Template

November 29, 2010 By Ritesh Sanap 1 Comment

WordPress

HTTP2 Server Push for W3 Total Cache Minify plugin

August 17, 2016 By Ritesh Sanap 5 Comments

How to Disable Emojis in WordPress

January 6, 2016 By Ritesh Sanap Leave a Comment

JetPack Related posts and Sharing not working with NGINX

November 10, 2015 By Ritesh Sanap Leave a Comment

Simply Pure – WordPress Theme

November 2, 2014 By Ritesh Sanap 2 Comments

Advanced What should we Write about next? – WordPress Plugin

July 28, 2014 By Ritesh Sanap Leave a Comment

How to Disable Self Pingback or TrackBack

January 16, 2014 By Ritesh Sanap Leave a Comment

BlueStrap – WordPress Theme

January 1, 2014 By Ritesh Sanap 15 Comments

How to Create Multiple Excerpts in WordPress

December 24, 2013 By Ritesh Sanap Leave a Comment

How to Disable Auto Update in WordPress

November 21, 2013 By Ritesh Sanap Leave a Comment

How to Delete Feedbacks from JetPack Contact Form

November 19, 2013 By Ritesh Sanap 9 Comments

Recent Posts

  • HTTP2 Server Push for W3 Total Cache Minify plugin
  • How to show hidden files and folders in Mac OS X
  • How to Disable Emojis in WordPress
  • Canva – Online Photo Editor
  • JetPack Related posts and Sharing not working with NGINX

Archives

Recommends

  • DigitalOcean – Cloud Hosting
  • Dropbox – Cloud Storage
  • Elegant Themes – WordPress Themes
  • LastPass – Password Manager
  • Like us on Facebook
  • Follow on Twitter
  • +1 on Google
  • Subscribe via Email
  • RSS Feed

© 2025 Best 2 Know · All Rights Reserved · We ♥ DigitalOcean