Best 2 Know

The Ultimate Blogging Resource

  • Advertising
  • WebHosting
  • Contact Us
  • Blogger
    • Blogger Templates
    • Blogger Tutorials
  • Browser
    • Firefox
    • Google Chrome
  • Google
  • Internet
    • Facebook
    • Twitter
  • Thesis
  • Windows
  • WordPress
    • WordPress Themes
    • WordPress Plugins
  • More
    • Linux
    • Review
    • Solutions
    • Announcements

Author: Ritesh Sanap

List Of All 255 Keyboard All Alt Key Codes

Do you know that you can put Alt codes in Twitter posts. This can make your updates look more unique. So here is list of all 255 Keyboard Alt Codes that you can use.

What are Alt codes : Alt codes are symbols that are not on keyboard but can be produced by pressing a simple alt key along with some number of codes from Numpad. Pressing these two keys simultaneously gives you a symbol.


Note : Always use NUMPAD to type the numbers

Here is the list :

1. alt + 1 = ?
2. alt + 2 = ?
3. alt + 3 = ?
4. alt + 4 = ?
5. alt + 5 = ?
6. alt + 6 = ?
7. alt + 7 = •
8. alt + 8 = ?
9. alt + 9 = ?
10. alt + 10 = ?
11. alt + 11 = ?
12. alt + 12 = ?
13. alt + 13 = ?
14. alt + 14 = ?
15. alt + 15 = ?
16. alt + 16 = ?
17. alt + 17 = ?
18. alt + 18 = ?
19. alt + 19 = ?
20. alt + 20 = ¶
21. alt + 21 = §
22. alt + 22 = ?
23. alt + 23 = ?
24. alt + 24 = ?
25. alt + 25 = ?
26. alt + 26 = ?
27. alt + 27 = ?
28. alt + 28 = ?
29. alt + 29 = ?
30. alt + 30 = ?
31. alt + 31 = ?
32. alt + 32 = “space”
33. alt + 33 = !
34. alt + 34 = “
35. alt + 35 = #
36. alt + 36 = $
37. alt + 37 = %
38. alt + 38 = &
39. alt + 39 = ‘
40. alt + 40 = (
41. alt + 41 = )
42. alt + 42 = *
43. alt + 43 = +
44. alt + 44 = ,
45. alt + 45 = –
46. alt + 46 = .
47. alt + 47 = /
48. alt + 48 = 0
49. alt + 49 = 1
50. alt + 50 = 2
51. alt + 51 = 3
52. alt + 52 = 4
53. alt + 53 = 5
54. alt + 54 = 6
55. alt + 55 = 7
56. alt + 56 = 8
57. alt + 57 = 9
58. alt + 58 = :
59. alt + 59 = ;
60. alt + 60 = < 61 =" =" 62 =" ">
63. alt + 63 = ?
64. alt + 64 = @
65. alt + 65 = A
66. alt + 66 = B
67. alt + 67 = C
68. alt + 68 = D
69. alt + 69 = E
70. alt + 70 = F
71. alt + 71 = G
72. alt + 72 = H
73. alt + 73 = I
74. alt + 74 = J
75. alt + 75 = K
76. alt + 76 = L
77. alt + 77 = M
78. alt + 78 = N
79. alt + 79 = O
80. alt + 80 = P
81. alt + 81 = Q
82. alt + 82 = R
83. alt + 83 = S
84. alt + 84 = T
85. alt + 85 = U
86. alt + 86 = V
87. alt + 87 = W
88. alt + 88 = X
89. alt + 89 = Y
90. alt + 90 = Z
91. alt + 91 = [
92. alt + 92 = \
93. alt + 93 = ]
94. alt + 94 = ^
95. alt + 95 = _
96. alt + 96 = `
97. alt + 97 = a
98. alt + 98 = b
99. alt + 99 = c
100. alt + 100 = d
101. alt + 101 = e
102. alt + 102 = f
103. alt + 103 = g
104. alt + 104 = h
105. alt + 105 = i
106. alt + 106 = j
107. alt + 107 = k
108. alt + 108 = l
109. alt + 109 = m
110. alt + 110 = n
111. alt + 111 = o
112. alt + 112 = p
113. alt + 113 = q
114. alt + 114 = r
115. alt + 115 = s
116. alt + 116 = t
117. alt + 117 = u
118. alt + 118 = v
119. alt + 119 = w
120. alt + 120 = x
121. alt + 121 = y
122. alt + 122 = z
123. alt + 123 = {
124. alt + 124 = |
125. alt + 125 = }
126. alt + 126 = ~
127. alt + 127 = ?
128. alt + 128 = Ç
129. alt + 129 = ü
130. alt + 130 = é
131. alt + 131 = â
132. alt + 132 = ä
133. alt + 133 = à
134. alt + 134 = å
135. alt + 135 = ç
136. alt + 136 = ê
137. alt + 137 = ë
138. alt + 138 = è
139. alt + 139 = ï
140. alt + 140 = î
141. alt + 141 = ì
142. alt + 142 = Ä
143. alt + 143 = Å
144. alt + 144 = É
145. alt + 145 = æ
146. alt + 146 = Æ
147. alt + 147 = ô
148. alt + 148 = ö
149. alt + 149 = ò
150. alt + 150 = û
151. alt + 151 = ù
152. alt + 152 = ÿ
153. alt + 153 = Ö
154. alt + 154 = Ü
155. alt + 155 = ¢
156. alt + 156 = £
157. alt + 157 = ¥
158. alt + 158 = ?
159. alt + 159 = ƒ
160. alt + 160 = á
161. alt + 161 = í
162. alt + 162 = ó
163. alt + 163 = ú
164. alt + 164 = ñ
165. alt + 165 = Ñ
166. alt + 166 = ª
167. alt + 167 = º
168. alt + 168 = ¿
169. alt + 169 = ?
170. alt + 170 = ¬
171. alt + 171 = ½
172. alt + 172 = ¼
173. alt + 173 = ¡
174. alt + 174 = «
175. alt + 175 = »
176. alt + 176 = ?
177. alt + 177 = ?
178. alt + 178 = ?
179. alt + 179 = ?
180. alt + 180 = ?
181. alt + 181 = ?
182. alt + 182 = ?
183. alt + 183 = ?
184. alt + 184 = ?
185. alt + 185 = ?
186. alt + 186 = ?
187. alt + 187 = ?
188. alt + 188 = ?
189. alt + 189 = ?
190. alt + 190 = ?
191. alt + 191 = ?
192. alt + 192 = ?
193. alt + 193 = ?
194. alt + 194 = ?
195. alt + 195 = ?
196. alt + 196 = ?
197. alt + 197 = ?
198. alt + 198 = ?
199. alt + 199 = ?
200. alt + 200 = ?
201. alt + 201 = ?
202. alt + 202 = ?
203. alt + 203 = ?
204. alt + 204 = ?
205. alt + 205 = ?
206. alt + 206 = ?
207. alt + 207 = ?
208. alt + 208 = ?
209. alt + 209 = ?
210. alt + 210 = ?
211. alt + 211 = ?
212. alt + 212 = ?
213. alt + 213 = ?
214. alt + 214 = ?
215. alt + 215 = ?
216. alt + 216 = ?
217. alt + 217 = ?
218. alt + 218 = ?
219. alt + 219 = ?
220. alt + 220 = ?
221. alt + 221 = ?
222. alt + 222 = ?
223. alt + 223 = ?
224. alt + 224 = ?
225. alt + 225 = ß
226. alt + 226 = ?
227. alt + 227 = ?
228. alt + 228 = ?
229. alt + 229 = ?
230. alt + 230 = µ
231. alt + 231 = ?
232. alt + 232 = ?
233. alt + 233 = ?
234. alt + 234 = ?
235. alt + 235 = ?
236. alt + 236 = ?
237. alt + 237 = ?
238. alt + 238 = ?
239. alt + 239 = ?
240. alt + 240 = ?
241. alt + 241 = ±
242. alt + 242 = ?
243. alt + 243 = ?
244. alt + 244 = ?
245. alt + 245 = ?
246. alt + 246 = ÷
247. alt + 247 = ?
248. alt + 248 = °
249. alt + 249 = ?
250. alt + 250 = ·
251. alt + 251 = ?
252. alt + 252 = ?
253. alt + 253 = ²
254. alt + 254 = ?
255. alt + 255 = “space”

February 27, 2009 Ritesh Sanap Internet, Solutions ALT keys, Cool things

How to Change the Welcome/Login Screen in Windows XP ?

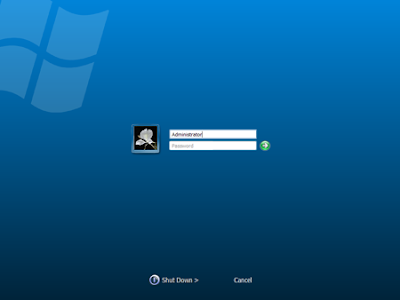
Seeing the same old blue screen each time you login to Windows XP can get quite boring for you with passing time. Probably the best way to get rid of this blue screen is to use the direct login feature and not see the welcome screen at all but for multi user computers the welcome screen acts as a login portal and you can not disable it whatsoever.

However there is a simple trick to change the welcome screen .

How would you Like this One ?
How to Change the Welcome/Login Screen in Windows XP ?

Change Windows Welcome (Login) Screen

Just make sure that you have the “Use welcome screen” option activated in
Control Panel –> Users Accounts –> Logon and Logoff Options
before trying to apply this trick.

Basically there are two ways to change your login screen.

First One is to either replace your default login screen with your new one and the other method is to play with the registry such that it recognizes the new login screen as the default one ..
The following steps will guide you how to over write your existing login screen with your new one.

Here are the steps :
1. Make a backup copy of C:\windows\system32\logonui.exe
2. Rename your new login screen to logonui.exe
3. Overwrite the existing login screen file with your new login screen and thats it you are done.

Second Method that will help Windows identify your new login screen as the default one. The good thing about this trick it that you don’t have to delete or replace your original login screen file. Here it goes.
1. Copy your custom login screen file under another name, let’s say logonuiA.exe, to C:\Windows\system3\
2. Open Start menu –> Run –> and type Regedit
3. Navigate to HKEY_LOCAL_MACHINE –> SOFTWARE –> Microsoft –> Windows NT –> CurrentVersion –> Winlogon and change the value for UIHost to logonuiA.exe.

Rever back To your Old Login Screen

If you ever feel like restoring your original login screen then all you have to do is use the backup copy of logonui.exe and paste it in C:\windows\system32\ and select over write.

You can Find free Login Screens Here.

August 30, 2008 Ritesh Sanap Internet, Solutions, Windows Cool things

Adsense Secrets – What g00gle never told You About Adsense – ebook

From the Book : The Truth Is That Those Who Have Been Following My Instructions Are Still Raking In Massive Passive Income By Claiming Their Piece Of The $3.2 BILLION Dollar Google Cash Machine

– Discover how to optimize your web site for high-paying clicks, using legitimate response-tracking techniques and software.

– Find out how to pull highly relevant ads on-demand, using Google Search

– Discover the secrets to getting more legitimate traffic to your web site

– Find out the scoop on Google’s new AdLinks and other new Ad Formats

– Learn how to optimize your web pages so the search engines will LOVE your site

– Understand how to format your ads so your visitors will want to click them

– Discover which colors, sizes, text color and borders will generate the most clicks

– Find out how to position your ads for maximum response– Explore which elements can draw instant attention to your ads, no matter where you place them

– Learn how to prune out low-paying ads that steal clicks from your high paying ads

– Find out how to build more pages for your web site quickly.

– Discover how to add FREE articles to your site – Web sites with over 12,000 articles you can use revealed!

– Learn about other pay-per-click programs. Know which ones you should keep your eyes open for.

– Discover where to find server-side scripts and software to track down the most “click-friendly” pages and search terms

– Learn how to read your server logs to find the hidden gold-mine

– Discover when and how to use the Google Search Box to maximize revenue from customers searching for something specific

– Learn how to read your visitors like a book, including:
— what drives them to your web site (search terms they used to find your web site)
— which ads they clicked and WHY
— which pages they’re visiting most often and WHY
— how to diversify into new keywords without affecting the relevance of your existing pages

Size : 7 mb

.Download.

August 25, 2008 Ritesh Sanap Internet, Solutions Cool things, Ebooks

XP DLL Library Restore : Restore And Repair All Corrupt DLL Files Back

Last time I told you about How to fix corrupted files in Windows XP. But this method requires Windows XP CD. And now here is a simple, fast and easy way to restore all your corrupted DLL files back with a single click.

XP DLL Library Restore is an application that can restore all your DLL files when needed. All you have to do is just install this program in your System32 folder and you are done

For our newbies let me tell you that System32 folder is situated in C:\WINDOWS

Now whenever any of the .DLL file will get corrupt this program will start its job and will fix it.

Download Instructions : Click here to download.

August 22, 2008 Ritesh Sanap Solutions, Windows Cool things

Blogger’s New "Reactions" Feature – How to add to customized blog templates

Blogger have added a new feature for us to use in our post: Reactions. This widget acts like a mini-poll beneath each of your blog posts and offers the ability for readers to leave feedback quickly.

The “Reactions” add-on is currently available through Blogger in Draft, though looks set to be moved over to the regular Blogger interface soon enough. It can be moved around like other elements in the post-footer and will adapt to the color scheme of your blog template. You can customize the buttons and labels through the “Blog Posts” widget in your dashboard if you prefer to use something different to the “funny/interesting/cool” labels which are implemented by default.

How to add “Reactions” to your Blogger template

To add this new function to your Blogger layout, you will need to activate the feature through Blogger in Draft. Once logged in to your Draft dashboard, go to Layout>Page Elements and click the “Edit” link for the “Blog Posts” widget.

In this pop-up window, you will see the option to add “Reactions” to your posts:

Tick the options box and edit the labels for your buttons as required. Then finally save this setting.

Adding the required code to your template
Depending on the type of template you are using, you will need to use one of two methods to add the required code to your template.

If you are using a default Blogger template with no modifications to widgets or the post layout…

Go to the Layout>Edit HTML page in your Blogger dashboard, and look for the “Revert Widget Templates to Default” link near the bottom of the page.

Clicking on this link will replace all of the widget templates with the updated code. All of your existing widgets will remain, so don’t worry about losing any data! Instead, this will simply replace outdated code with new code, and ensure you can add all of Blogger’s new features with ease.

If you use a customized/third party template…

You will need to add the required code to your template manually.

In this case, go to Layout>Edit HTML in your Blogger dashboard and check the “Expand widget templates” box.

Next, search for the following line of code (or similar):

Immediately after this line, add the following section of code:

Preview your template to see the “Reactions” add-on appear beneath each of your blog posts, and finally, save this new addition to your template.

If you cannot find the “post-footer-line” in your blog template, search for

instead, and paste the code immediately after this line.

Color Schemes for the Reactions Add-on

The colors for the reactions add-on are taken from existing variables in your color scheme:

* Foreground: textcolor, textColor, mainTextColor
* Highlight: linkcolor, linkColor, mainLinkColor

This is to ensure that the color matches the overall scheme of your blog. So if you change the color scheme through the Fonts and Colors section, the colors of your reactions will change too.

To learn more about this new feature, be sure to read the announcement post on Blogger in Draft. Please let me know if there’s anything else you need to know about this new feature by leaving your comments below.

August 16, 2008 Ritesh Sanap Solutions Cool things

Top And Latest High Paying Keywords : Increase Your Adsense Earnings


Good traffic, soo many clicks, lots of visitors and still poor earnings ? Then this post will be really helpful for you. Here is a list of top and latest high paying keywords that will increase your adsense earnings.

First let me tell you what are keywords and how to use these keywords to earn more from Adsense.

Keywords : Keywords are the words that people enters in the search engine to find websites. The search engines then checks its database and provide you with list of websites. Thus keywords can increase your traffic through search engines.

The ads that appear on the websites depends upon the keywords only. So if you have high paying keywords then you can earn more $$ per click. So here is a list of top high paying keywords for you :

Keywords giving more than 30 USD :

Mesothelioma , Structured settlement , Vioxx attorney

Keywords giving more than 20 USD :

Search Engine Marketing, Help Desk, Donate A Car, Cord Blood, Refinance,

Keywords giving more than 10 USD :

Forex, Student Loan Consolidation, Web Hosting, Medical, Data Recovery.

Keywords giving more than 5 USD :

Affiliate Program, California Divorce Lawyer, Fraud, Invention, Personal Loan.

Keywords giving more than 1 USD :

Haircut, Lung Cancer, Donation, Online Degree.

How and Where to put these keywords :

Just go to Blogger.com and goto Layout and then Edit HTML. Just after the section put this code

I am not saying that this will not boost up your earnings but you will see the increase in your earnings yourself.

August 16, 2008 Ritesh Sanap Google Adsense, Cool things

Hard Drives are not opening/working by Double-Click – Solution

A Friend of mine at College had a problem in his Laptop. He said “My C:/ drive is not Opening with Double-Click“. I immediately responded coz I had the Similar problem Once. In these cases the Drive Icon changes sometimes. So here is a Quick Solution to the Problem…

When you open C drive or other drives by double click it’ll pop up Open With windows and ask you to choose the program to open that drive.?Or errors such as

1. Access Denied
2. VBScript error with error code of 800A041F
3. Drive opens in new windows

Solution-I

Open control panel (classic view)/folder options. Scroll down advanced settings window and uncheck the “use simple file sharing”.Apply and right click on the volumes in question, select properties and click on “security” tab.(You need to set permissions on those volumes in the administrator rights.)

Microsoft KB 308419

There you’ll see detailed sharing permissions/restrictions for all relevant accounts on that particular drive/file/folder. (Taking that you have administrative permissions) click on “Administrators ([computer name]Administrators)” (first one from the top) and check allow on “full control” and click “apply”.

If you see your account name on the list, either remove it or allow full control. If you are only user on that PC I suggest removing it from the list, for you are administrator and comply with “administrators” permissions.

After setting the permission, click on the “advanced” button. In the first tab select “Administrators ([computer name]Administrators)” (same as before) and check the “Replace permissions entries on all child objects with entries shown here that apply to child objects” and apply

Solution-II

Normally when a virus infects a windows system which causes a drive opening problem, it automatically creates a file named autorun.inf in the root directory of each drive.

This autorun.inf file is a read only ,hidden and a system file and the folder option is also disabled by the virus. This is deliberately done by the virus in order to protect itself. autorun.inf initiates all the activities that the virus performs when you try to open any drive.

Follow the set of commands below to show and delete the autorun.inf

1. Log in as Administrator or user with administrator rights.
2. Turn Off system restore.
3. Start–>> Right Click My Computer–>> Properties–>> System Restore Tab–>>Turn off System Restore on all drives–>> Apply–>> Ok.
4. Launch Task Manager by pressing alt+ctrl+del
5. click on processes tab.
6. Find wscript.exe, If it is running end this process..
7. End EXPLORER.EXE process from Task Manager
8.
Open Start>>Run and type cmd and press enter. This will open a command prompt window. On this command prompt window type the following steps.
9. Type cd
10. Type attrib -r -h -s autorun.inf
11.

Type del c:autorun.* /f /s /q /a

del d:autorun.* /f /s /q /a

del e:autorun.* /f /s /q /a sparksspace019

12. Now type d: and press enter for d: drive partition. Now repeat steps 3 and 4. Similarly repeat step 5 for all your hard disk partition
13. Start>Run>Type ’regedit”. Navigate to the following registry key:

HKEY_LOCAL_MACHINESOFTWAREMicrosoftWindows NTCurrentVersionWinlogon

Find this key: userint.exe .make sure its value is Userinit”=”C:WINDOWSsystem32userinit.exe,If, It is not, than changed value to this value.
14. Restart your system .

August 16, 2008 Ritesh Sanap Solutions, Windows Cool things

Create Cool Images With a Wet Floor Effect Maker

Ever since the beginning of “web 2.0?, designers started creating logos or images with reflections that look pretty cool. Most of the time these images are done by professional in-house web designers which most of us bloggers don’t have the skill or access to. Fortunately there are two sites I came across that can add this effect to any image you’d like to apply it to.


The first one is called Wet Floor Maker which has several options such as angle, camera height, brightness, reflectivity, and more. Just upload your image and adjust the options to your liking and voila….you’ve got a cool new wet floor effect image. Here’s the end result of one test image I created:

The second site is called Image Reflection Generator and it doesn’t have nearly as many options as Wet Floor Maker does. The final image did look a bit more professional, however but you have no control over the angle of the reflection which I don’t like. Here’s the same image but after converting it with Image Reflection Generator:

These are convenient and quick ways to create images with a wet floor effect without any photo editing experience. The one thing I don’t like about both of these sites is you can’t preview the image before you click the “create image” button. Several times the end result image wasn’t exactly what I wanted so I had to go back and start over again. Kind of a pain but since the service is free, I can live with it. Try both out and let me know which you like better!

August 15, 2008 Ritesh Sanap Internet, Solutions, Windows Cool things

Posts pagination

Previous page Page 1 … Page 38 Page 39 Page 40 … Page 52 Next page

Currently Trending

  • How to download Specific parts of YouTube videos
    How to download Specific parts of YouTube videos
  • Windows Vista CD key
    Windows Vista CD key
  • How to retrieve my Demonoid username
    How to retrieve my Demonoid username
  • How to add Logo to Thesis theme
    How to add Logo to Thesis theme
  • How to Delete Feedbacks from JetPack Contact Form
    How to Delete Feedbacks from JetPack Contact Form
  • List Of All 255 Keyboard All Alt Key Codes
    List Of All 255 Keyboard All Alt Key Codes
  • h4x0r ( Hacker ) - Blogger Template
    h4x0r ( Hacker ) - Blogger Template

Get Latest post in your Inbox

Random Posts

Get Adsense Approval Easily With US In One Day

May 8, 2010 By Ritesh Sanap 7 Comments

How to show hidden files and folders in Mac OS X

August 2, 2016 By Ritesh Sanap Leave a Comment

Make Mozilla Run At Blazing Speed

December 17, 2007 By Ritesh Sanap Leave a Comment

How to add Favorite Menu in WordPress

August 21, 2011 By Ritesh Sanap 1 Comment

How to Show offline in Gtalk or How to be invisible in Gtalk

April 19, 2010 By Ritesh Sanap Leave a Comment

WordPress

HTTP2 Server Push for W3 Total Cache Minify plugin

August 17, 2016 By Ritesh Sanap 5 Comments

How to Disable Emojis in WordPress

January 6, 2016 By Ritesh Sanap Leave a Comment

JetPack Related posts and Sharing not working with NGINX

November 10, 2015 By Ritesh Sanap Leave a Comment

Simply Pure – WordPress Theme

November 2, 2014 By Ritesh Sanap 2 Comments

Advanced What should we Write about next? – WordPress Plugin

July 28, 2014 By Ritesh Sanap Leave a Comment

How to Disable Self Pingback or TrackBack

January 16, 2014 By Ritesh Sanap Leave a Comment

BlueStrap – WordPress Theme

January 1, 2014 By Ritesh Sanap 15 Comments

How to Create Multiple Excerpts in WordPress

December 24, 2013 By Ritesh Sanap Leave a Comment

How to Disable Auto Update in WordPress

November 21, 2013 By Ritesh Sanap Leave a Comment

How to Delete Feedbacks from JetPack Contact Form

November 19, 2013 By Ritesh Sanap 9 Comments

Recent Posts

  • HTTP2 Server Push for W3 Total Cache Minify plugin
  • How to show hidden files and folders in Mac OS X
  • How to Disable Emojis in WordPress
  • Canva – Online Photo Editor
  • JetPack Related posts and Sharing not working with NGINX

Archives

Recommends

  • DigitalOcean – Cloud Hosting
  • Dropbox – Cloud Storage
  • Elegant Themes – WordPress Themes
  • LastPass – Password Manager
  • Like us on Facebook
  • Follow on Twitter
  • +1 on Google
  • Subscribe via Email
  • RSS Feed

© 2025 Best 2 Know · All Rights Reserved · We ♥ DigitalOcean